I'm hooked on sharing sugary delights... I have two pages on facebook

For the whole wide world of English speakers out there, native and otherwise, I also have a Facebook page appropriately titled
top of the world cakes. Find me there, if you dare :)

And for those lucky few of you out there who understand Icelandic (I'm not joking there are only about 300.000 people in the whole Icelandic nation) I have an Icelandic Facebook page, just look for veislu kökur http://www.facebook.com/veislukokur

16 November, 2013

Viking ship cake

Viking Ship Cake


I was asked to make a ship cake for a Viking themed celebration. (we are in Iceland and it's not that big a stretch of the imagination)

After some discussion with the boy/young adult who was to be the centre of attention this particular day we went for pear-and-chocolate-whipped-cream-on-a-sponge-cake cake.

It happened like this...

I baked Huge amounts of base, simple white sponge, nothing fancy there.

Then cut to shape-ish.

Hollowed out and filled with fresh pare, tinned pare and a drizzle of melted chocolate.


What you see before you is the ocean.

I decided to layer it because I wanted to fill it with chocolate whipped cream, almost like a pudding. and it would be unfair for some of the guests to get nothing but base while others would wonder how the masses of whipped cream and marzipan could be called a cake.


 What do you mean it's not a Viking Ship Cake ?

 I put a lot of cream and much more pear into the base, then cut the ship itself apart and filled it too.
Then I forgot to take pictures until I had placed the coloured marzipan on and really gone wild with the decorations....

Note to self.
Must remember to use camera more.
 By the time I remembered to take pics again it was in the fridge.
When decorating a cake filled with Whipped cream it's imperative to keep the temperature down.

So I had to work fast. (that's my excuse for not taking pictures.)

I pressed lines into the deck of the ship and painted them with black food colouring, I wanted to make a cartoon feeling ship.
 Next step was to wash the ship in water with a little coco powder, that gave it a shine.

The head of the ship is made from gumpaste.

I added little swirls of water to try to get some movement and seaweed for more colour.


 The big mound in the middle is also full of cake.

At this point the whole thing was really heavy and the sponge cake was wet.
I worried about leakage but it stayed ok.


I tried to make it look impressive from all angles because I knew the cake table would be in the center of the room.


The sail was made from 400 gr melted black chocolate.
Solid.


I think it turned out nice.


Challenge me ;)


13 July, 2013

Icelandic Lamb

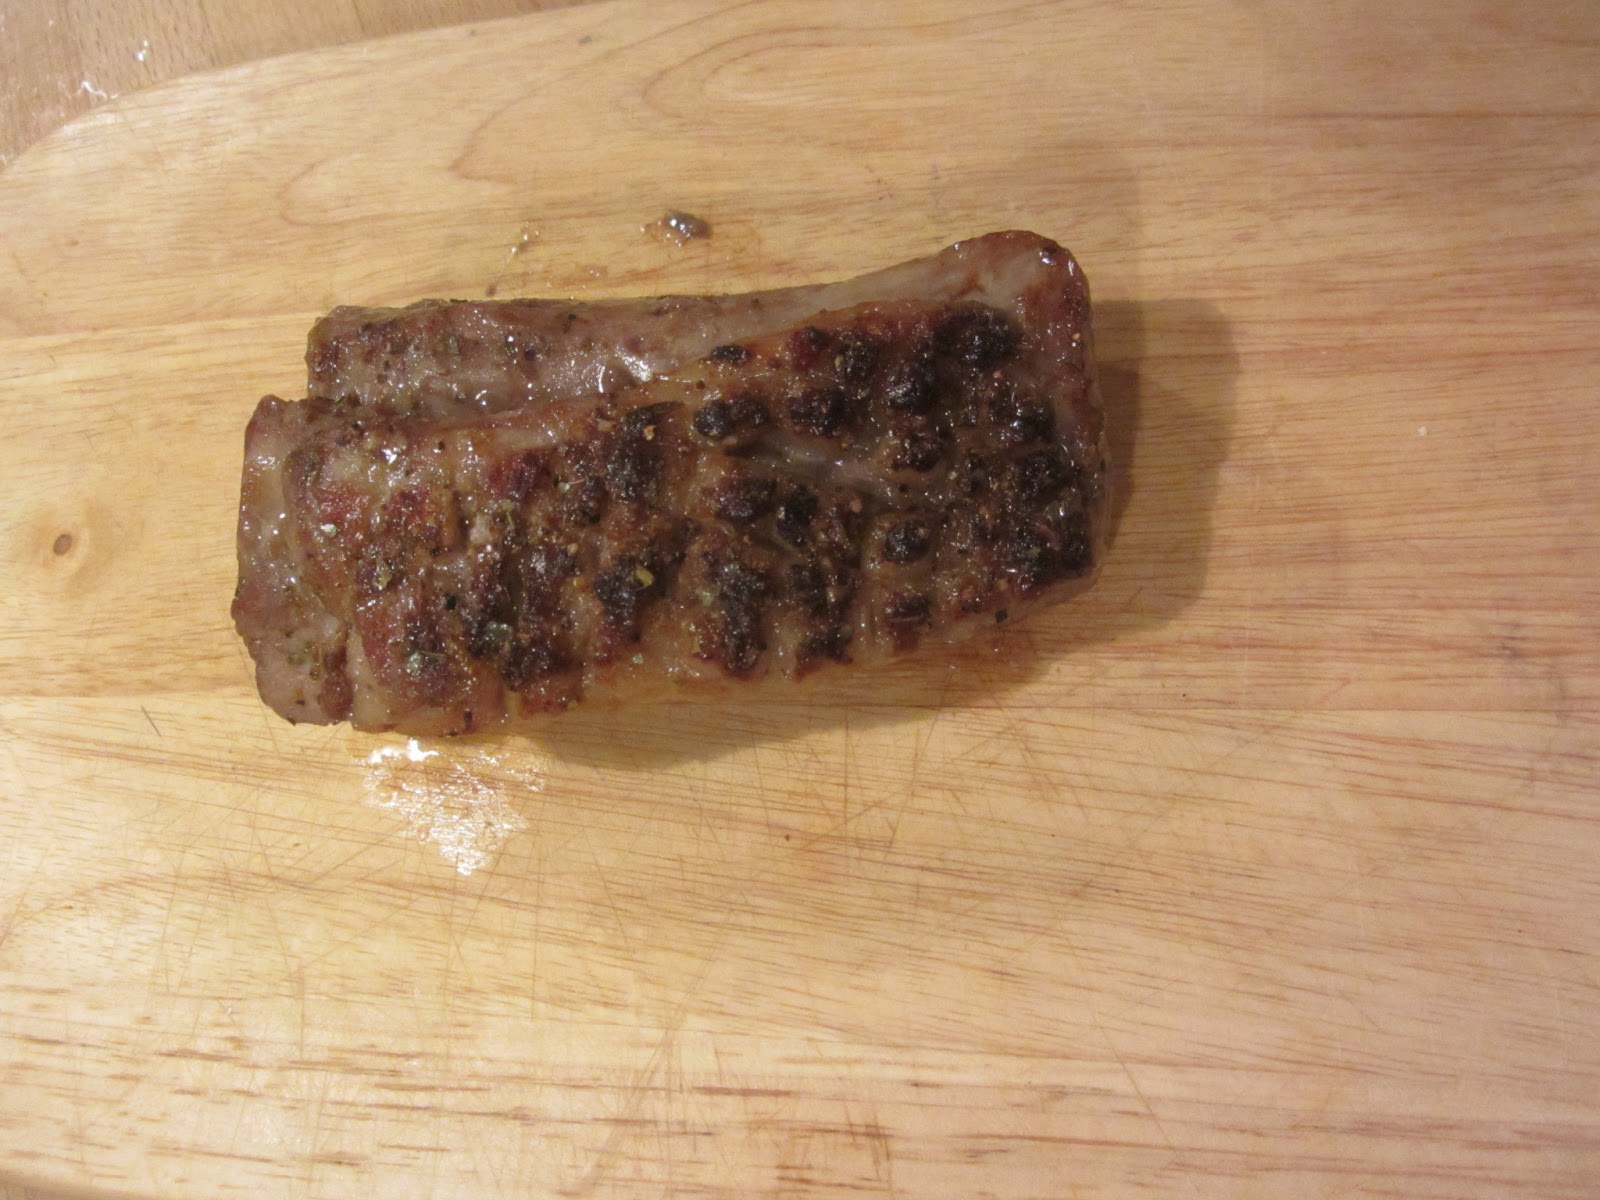
Icelandic Lamb Tenderloin Cut

If you ever come to Iceland you have to taste the Icelandic lamb. 
Leg of lamb (Lambalæri) with potatoes and gravy is a traditional Sunday meal all around the island and lamb meat soup (Kjötsúpa) is something that you quite literally cant miss. (honestly, they make it at all they top tourist attractions.)

If you hit the road in Iceland you will inevitably have to slow down or sway off it at some point to avoid hitting wandering sheep with their lambs. Not that they have the right of way or anything, but just because they will be on the road staring you down. They roam the highlands freely during the summer and have a tendency to wander down into the lowlands too.
Grass is always greener... and all that.
These three ran off the road when we passed them the other day.
Cute.

Enough Iceland trivia, back to food.

Preparation 

The tenderloin is easily the best meat on the Icelandic lamb
It comes from the area around the spine of the animal and is a muscle that isn't overly strained at any point. So it stays soft.
 
These pieces are about 200 - 250 gr each, not much but it's more than enough for two people.
They are available with of without the fat, but I recommend that the fat stay on. For reasons yet to be revealed.

Grab a very sharp knife and slice shallow grooves into the fat.
Don't cut right down to the meat, that will spoil it.

I like to make a diamond pattern by cutting across the groves again.

Seasoning

Lightly sprinkle with salt and dried herbs other spices at will. Rub them into the grooves.

The herbs I use are found in a nice little mix called "Bezt á lambið" the 'z' intentionally placed there for amusement as it does not exist in the Icelandic alphabet.

It translates as 'Best on the lamb' and it's an Icelandic production, two women wanting to share their herb mixing skills.


They list the ingredients as:
"only quality spices. Parsley, basilikum, mint, rosemary, majoram, oregano, lemon pepper, paprika, litle bit of salt (comes with the lemon pepper) and some more spices in smaller portions."

Cooking

Heat the pan at a low heat and place the Lamb sirloin fat down on it.
This way the fat will melt and cook into the meat making it nice and flavorful.

It's better to let it sit there and simmer in it's own juices on a low heat than to slap it down on a hot pan and burn the spices.

I leave it for 5 to 7 min, depending on the thickness of the meat.
Then roll it over to seal the other side.


Now pace it in the hot oven for another 10 minutes and then let it stand and rest for another 5 before cutting it.

See how it is nice and pink in the middle but has a lovely crust of spices on the top.

This time round I finished the dish off with a twice baked potato as a side as well as a generous helping of corn and green peas.

I'm telling you this is perfection.


 Look for my recipe for twice baked potato on my blog and check out some fun ramblings about the Icelandic sheep on my other blog.


11 July, 2013

Atlantic Salmon dinner

Simple Salmon Recipe with Sweet potato and red onion on the side.

We have a lot of fish here...
Big fish, little fish, pink fish, flat fish, white fish, fat fish, good fish, shark.

It's one of the perks of living in Iceland.

Admittedly I could/should probably cook more of it.

should'ave, could'ave, woulda've


I could make excuses all day...
But instead I'm going to try to mend my broken ways and cook more fish in the future.
I'm counting on you to keep me to this promise.

I'm starting out with a little something that can't go wrong.
It's so simple.

I'm not going to give any measurements because you basically cook what you need but I will say that for two people about 350-400 gr of salmon should be enough, the rest is up to you.

You will need

Fresh Salmon
Sweet potato
Carrots
Red onions
Lemon
Lemon pepper

Get the potatoes into the oven first... they take the longest.

Sweet potato side dish:

Cut your sweet potato into little squares.
The rule of thumb here is that the smaller they are the shorter the time it takes to cook them.

Cut carrots into equally small slices, they can be a little bigger because sometimes it's nice to have a little crunch to them.

Add some chopped red onion, any way you want to chop, I like irregular pieces for different flavors.

Mix with oil and a little salt in an oven dish and place in a very hot oven.

200dC


The sweet flavor of the onions when they are slightly caramelized in the heat make this one of my favorite side dishes.

Give them at least a good 20 to 25 min in the oven, sometimes even longer.
I poke the sweet potato with a knitting needle to see if they are done. (that's the only use I have for a knitting needle)

Of course it's a matter of taste, it depends on how you like your potatoes and carrots.

For me it varies, I sometimes like them to be completely cooked through making them soft and creamy, but at other times I want that little crunch in the middle, the al-dente effect.

This time, the picture shows, they are steamy hot and just barely cooked, nice and soft but not singed at the edges.


The salmon is a nice flavorful fish, it has a soft taste that you  either like or you don't.
I like.

This piece of freshly caught Atlantic salmon weighs about 450 gr.

I let it rest on the table for 20 min.


If you take it straight out of the fridge and slap it on the grill or pan you will shock the meat.
Just look at that color.


I cut it into nice equal pieces each one about 4-5 cm wide.

Check for the small bones and remove them if you find any, I got this bone-free at the fishmongers.

The nice woman there also de-scaled it for me because I wanted to leave the skin on during cooking.
 
Drop a generous dollop of butter on a hot pan and let it melt before introducing your salmon to the heat.

Leave it scales down on the pan on a low heat.
Sprinkle with salt and some lemon pepper.
Keeping it simple doesn't have to be boring.
The butter also gives it a nice rich flavor.

You can cover the pan with a lid for two minutes if you want to steam it in it's own juices.

When the fish turns a pale pink color it is done.
You could test it by cutting into it and if the color is consistent through the whole fish it is done.
The skin is crunchy and adds both texture and flavor to the dish.

A wedge of freshly cut lemon doesn't hurt.


01 February, 2013

Developing the jam jar lunch

GOOOOD Morning
and in case I don't see you
good afternoon, good evening, and good night.

I've been packing the Jam Jar lunch regularly for some time now and have come up with some nice ideas to change it from time to time so that the kids don't get tired of it.
Sometimes I use blueberry-yogurt instead of the vanilla.
And I've recently started packing my own version of it in a much bigger jar, turns out it's quite good for grown ups too.


What I did was add some chunky fresh fruit to the jar after the yogurt like little bit's of
strawberry,
blueberries,
apples or bananas.

When that go old I did some raisin days :)
Then I turned to the good old granola.
But I didn't add it till later so that it wouldn't get soggy.


I'm thinking that some chocolate pieces might be next on the list for testing.

let me know in the comments below if you try this out or something like it :)

Here's a link to the original blog about these little jam jar delights.

http://topoftheworldcakes.blogspot.com/2012/12/healty-snack-in-jam-jar.html

28 January, 2013

How to sprinkle Icing sugar


Tips, Hints and Help

Every now and then I will be adding little baking tips to the blog.
Hope you like it.

What to do when you want to sprinkle icing sugar on something but you don't want it to go all over the place?

If you find yourself in the position of having to decorate something delicately with a sprinkling of icing sugar here's what you can do:

Use a tea-strainer,
one of those small balls of wire-mash that you can put fresh tea leaves into and leave in the mug / cup to soak.
Just scoop some sugar into it and dust away.


I used it to decorate the individual vanilla pudding I served at Christmas.

You can find that recipe here too, look for 
Recipe Vanilla Pudding from scratch
http://topoftheworldcakes.blogspot.com/p/vanilla-pudding-from-scratch.html 
  

26 January, 2013

Pizza: calzone and cheesy garlic bread in one

Make your own pizza... call it what you will

I was making pizza at home the other day, (Great Pizza recipe below... keep reading) and as it happens not everybody likes the same topping.

Our solution up until now has been to make lots of pizzas with different toppings, maybe splitting the pizza in half or quarters because you can't bake 5 pizzas in one go, at least not in my oven.

But splitting the pizza like that has it's disadvantages, the main one being, I find, is that pizza toppings don't respect borders or boundaries. They don't care which half of the pizza they should stick to.

The flavors from toppings like blue cheese, or pepperoni or pineapple or pretty much anything that releases oils, liquids or melts easily is going to find its way all over the pizza and "contaminate" other parts of the pizza.

Nobody said sharing was easy.

Leading us back to the original solution of making individual pizzas.

I have issues with this method too, it means that someone is going to eat first and someone is going to eat last, unless you want to wait, in which case someone is going to have a cold pizza and someone is going to burn their tongue.

Then there's the whole issue of the garlic bread, as a side dish.
When is the right time to make that?
First? - so that everyone can enjoy it as a starter?
Split the difference?- make it midway?
or
Last?- so that the people who got their pizzas first have filled up on it and leave more for you? 
I'm usually the one who ends up eating last.

Maybe it's not really that big an issue... I don't know...
These things have a way of sorting themselves out for themselves.
But it got me thinking...
And when that happens... there's no turning back.
  
My solution...
The remember the calzone?
It's a kind of stuffed pizza, where the toppings are piled up on half the pizza and covered with with the other half. You end up with half a pizza stuffed with three times the topping of a normal one, can't go wrong.

The Icelandic name for it translates into Crescent Moon Pizza, which I like. I think it captures the meaning quite nicely.

I did a little bit of this, and a little bit of that, and added some oregano...

Here's what I did.
I'm torn between calling it the
the Calzone Corner Pizza
or
the Custum Corner pizza
(help me decide)

Anyways...

Flatten the pizza dough into a square.
Even if I'm not making the calzone corners I like the square pizza, there's more room for toppings.

Add your pizza sauce (or ketchup and spices) as per usual, but only in the corners.
Leave lots of room in between the circles....

Add a topping of your choice.


Here I grated cheese, put some pepperoni squares and some pineapple chunks and little bits of ham. (definitely not kosher)


Fold in the corners


Cover your pizza toppings with the corners of dough by pulling them over and towards the center of the pizza.


Press the corners down so that there is less chance of the insides turning into outsides.


By doing this you have created the pizza equivalent of "no-man's land".

Even if some juicy flavors were to escape from your folded corners and roll on towards the center, no harm done..
They sit in the cheese (see next step) closest to their designated quarters.


Now...

Make garlic bread
Use the empty space in between to make the garlic bread, don't put any pizza sauce underneath.

Sprinkle cheese in the empty spaces between your stuffed corners.

Be generous with the
- pizza cheese,
- chopped fresh garlic
- grated Parmesano Reggiano

- slithers of red onion

Like like this.......


Bake the Stuffed Pizza in oven
200 dC
for
10 min
or
until Golden Brown


Serving it up
When the home made custom calzone corner Pizza looks ready, take it out of the oven, drop a little pizza sauce on each corner, some cheese and sprinkling of parmesano and let it rest for a few minutes.


Brush some garlic oil on the cheesy center.

Cut into 4 triangles

Plate up and everyone can eat at the same time.

This slice of stuffed pizza is the equivalent of at least two generous slices of regular pizza, in addition it is surrounded by tasty soft garlic bread.


Now the Pizza dough recipe as promised:
(Makes two pizzas)

You will need:
700 gr. flour
1/2 tsp. salt
2 1/2 tsp. sugar
2 tbsp. yeast

280 ml. water
120 ml. oil
80 ml. beer

Yes there's beer in it.
Mix the dry stuff in one bowl and the liquids in another.
Stir together at first, when that is not possible anymore, knead for 5 min.
Leave to rest in the bowl under a damp cloth for 30 min.
Split the dough in half.
Then make pizza.

Remember
I'm torn between calling it the
the Calzone Corner Pizza
or
the Custum Corner pizza
(help me decide)

As always...
 
Happy baking

24 January, 2013

Back in baking action - Simple marshmallow fondant

Hello everyone
The last few weeks have been very busy to say the least...

But now I'm back and I'm trying out new things in the kitchen like never before, seriously, I've never before had the good sense to keep the camera in the kitchen with me at all times, but now that it's found it's new home it's up to me to use it wisely.
After all, with great pixels comes great responsibility.

Unfortunately I didn't always have the power of the photograph at my side so I have some "must have" recipes which I want to share but I will have to add more pictures later. It's not like I make some of this stuff every day... unfortunately.
Anyway

I thought I'd share something I think people google a lot :)

For the baking beginner and the brightest stars alike :)

I cannot stress enough how sticky everything will unavoidably get, but that should not stop you... after all...
It's only sugar
 

Marshmallow Fondant

You will need:

1. bag of marshmallows (between 25-30 pieces)
2-3 tbsp water
lots of powdered sugar - confectioners sugar - (at least 750 gr)
vegetable shortening (for the grease, here it's called Palmin)
microwave oven
big bowl, one that doesn't absorb the heat in the microwave
big spoon

Grease the bowl and spoon thoroughly.
Add marshmallows to bowl.
Give it 30 sec in the microwave, stir... and another 30sec.
Add water... stir.

Note:
(depending on the power of the microwave maybe you need another minute or two)


The marshmallows should be really fluffy and starting to puff up at this point, melted on the inside...
Then add the sugar... don't be hasty... add the powdered sugar bit by bit (may want to use a sieve, less risk of getting the fondant all lumpy)

Your basic marshmallow fondant is now taking shape (or not since it's probably just a big sticky mess)

If you want to add color, now is a good time...

Or
I like to make a lot of white marshmallow fondant first and knead in the color later, that way I'm not committed to a specific color.

Keep stirring in the sugar
BEWARE it will be extremely sticky and will go everywhere, that's why you want to grease everything up, including your hands.


When it gets thicker grease up a table top and knead in more sugar until you can touch it without it sticking to you.


You should end up with a thick white lump that you can roll out.
Keep the powdered sugar at hand while you work with it, you can add more if you think you need it.


If you don't use all your marshmallow fondant right away wrap it in plastic... It will keep good for up to a month in the fridge.

hope it works out well :)


I made this Bob the Builder with that marshmallow fondant recipe.
I think it worked out nice.